

Prerequisites
Before we start, ensure you have the following:
An active AWS account.
An Amazon EC2 instance where your application is deployed.
Basic knowledge of AWS services EC2 instance and Route53.
A domain registered with Namecheap.
Registering a Domain with Namecheap
If you haven't already registered a custom domain, you can do so through domain registrars like Namecheap or Godaddy. Choose a domain name that aligns with the purpose of your application.
- Go to the NameCheap Website and search for a domain
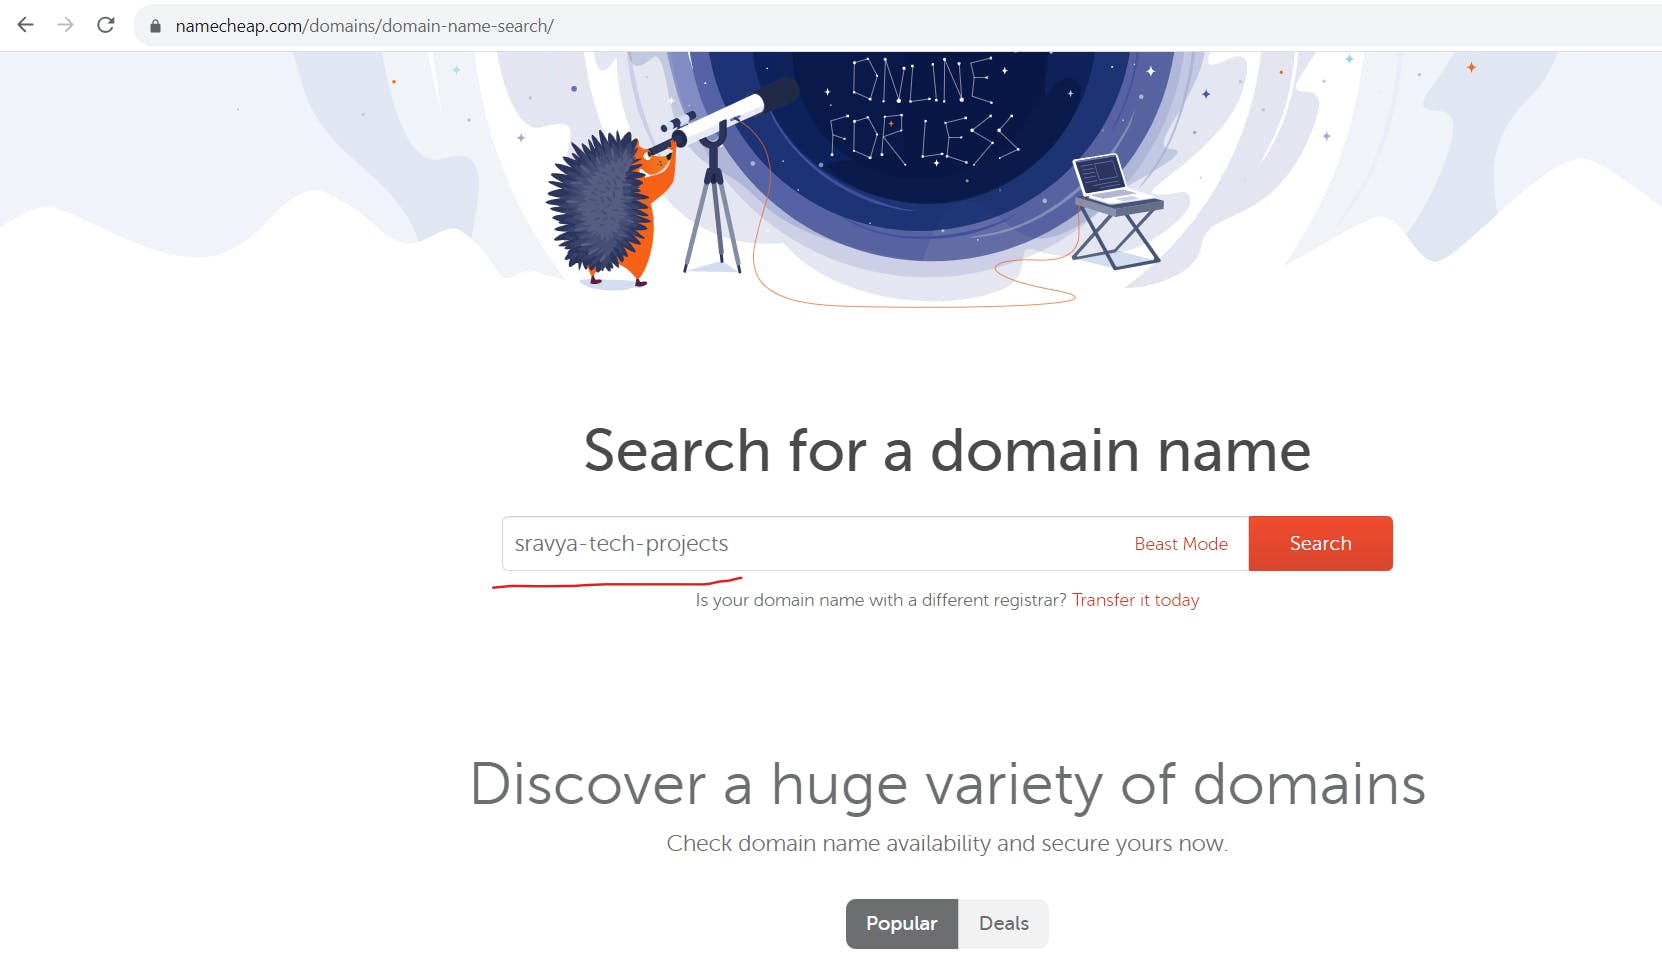
- Choose a domain name that aligns with the purpose of your application.
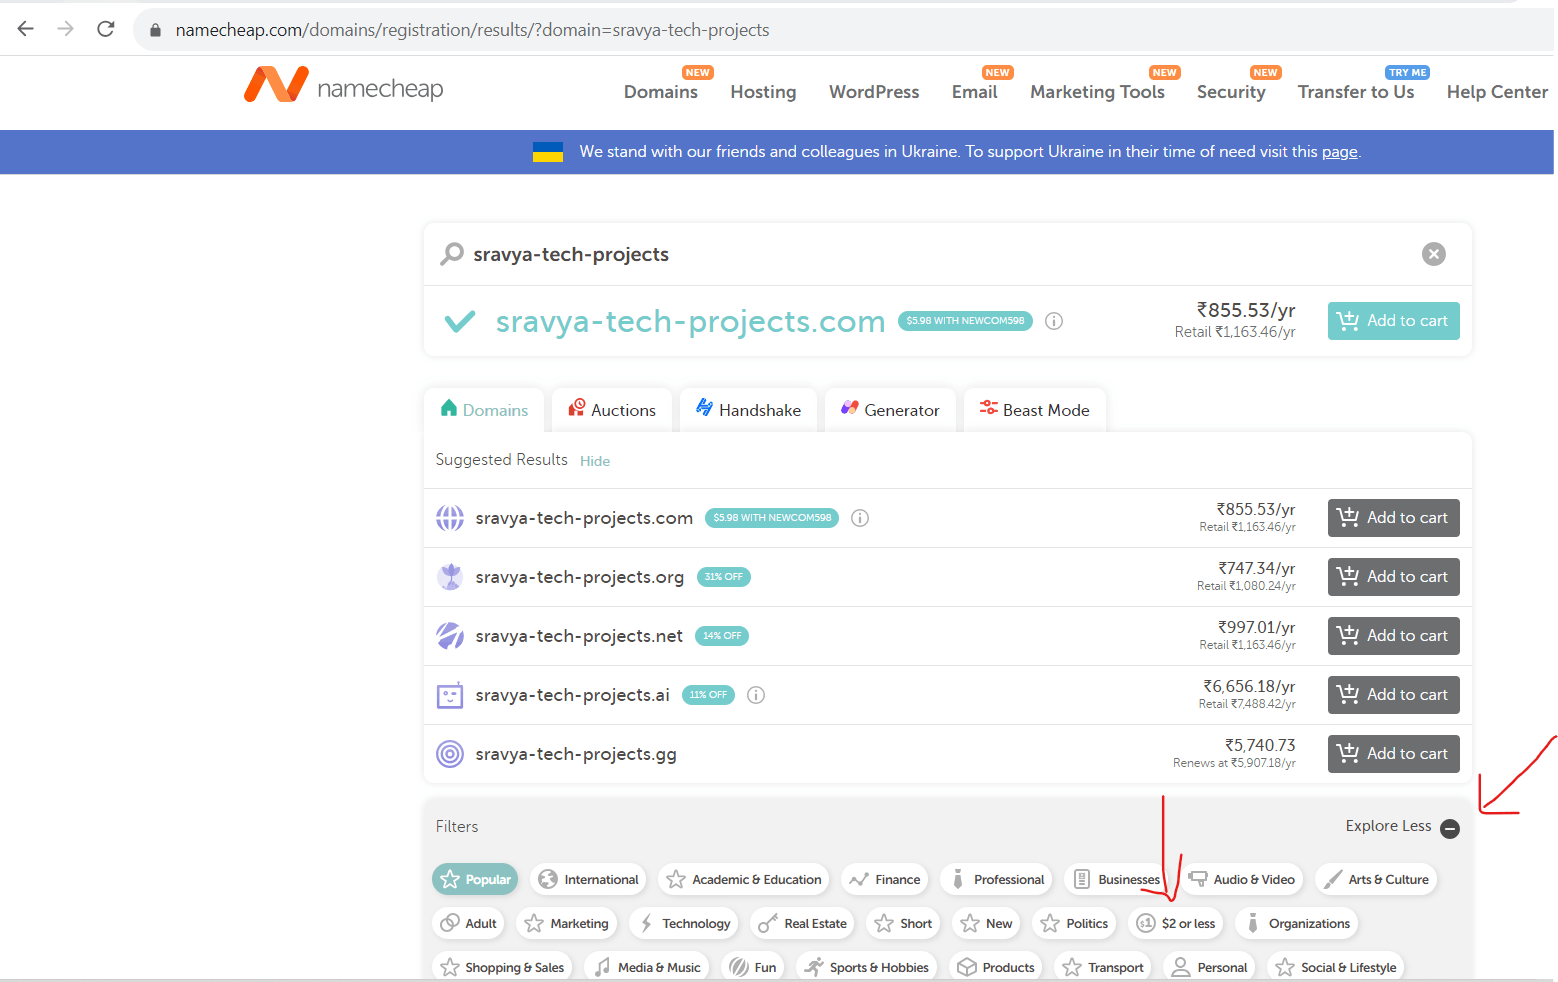
Note: If you want a domain for your practice click on Explore and select $2 or less then you can find the domain below $2
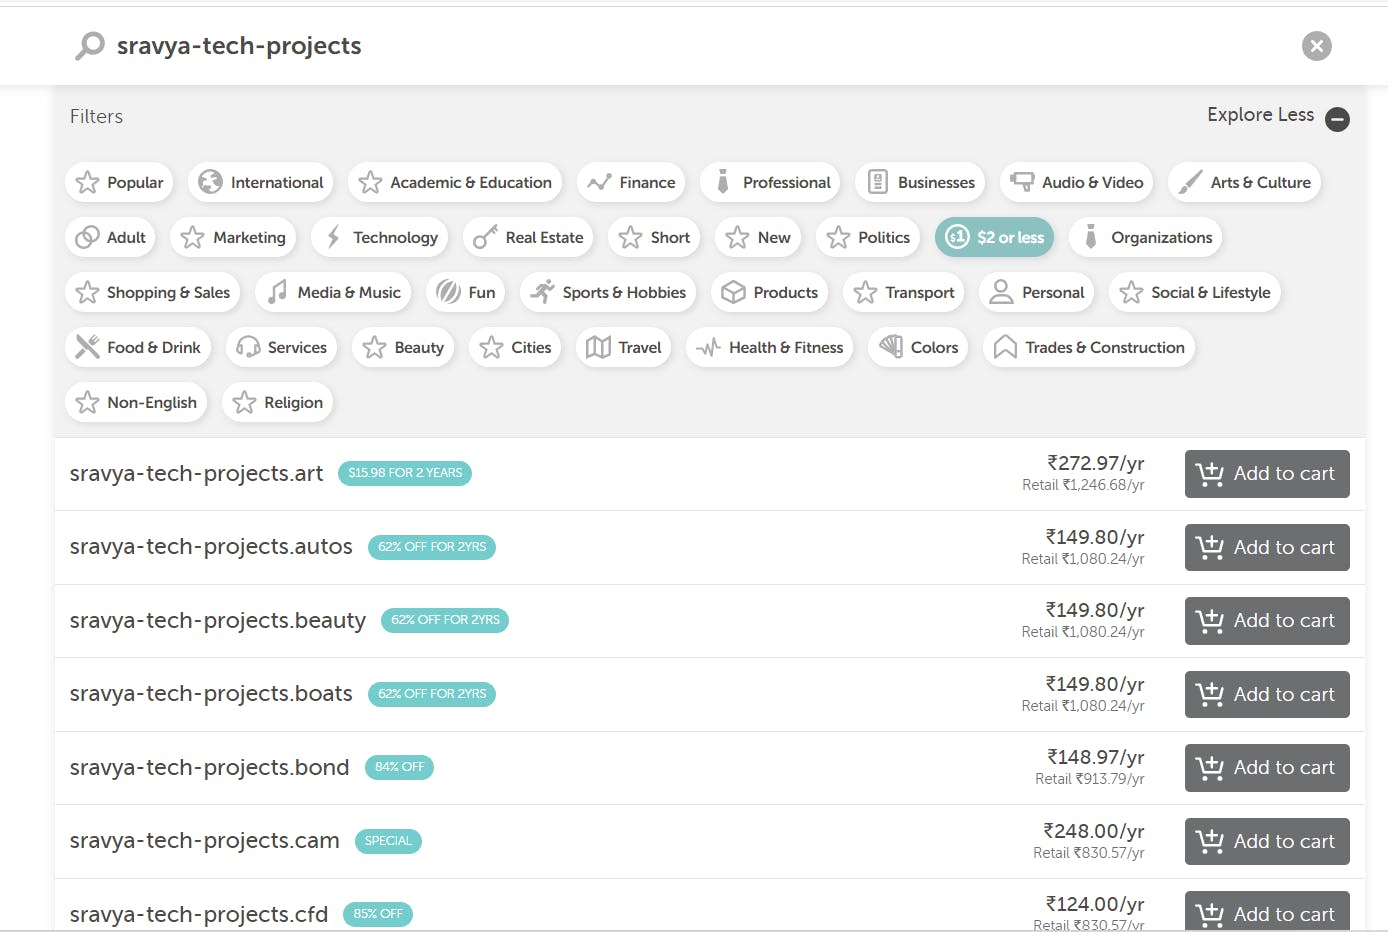
- Click on Add to Cart and Checkout to buy your domain based on the purpose of your application

Configuring AWS Route 53 Hosted Zones
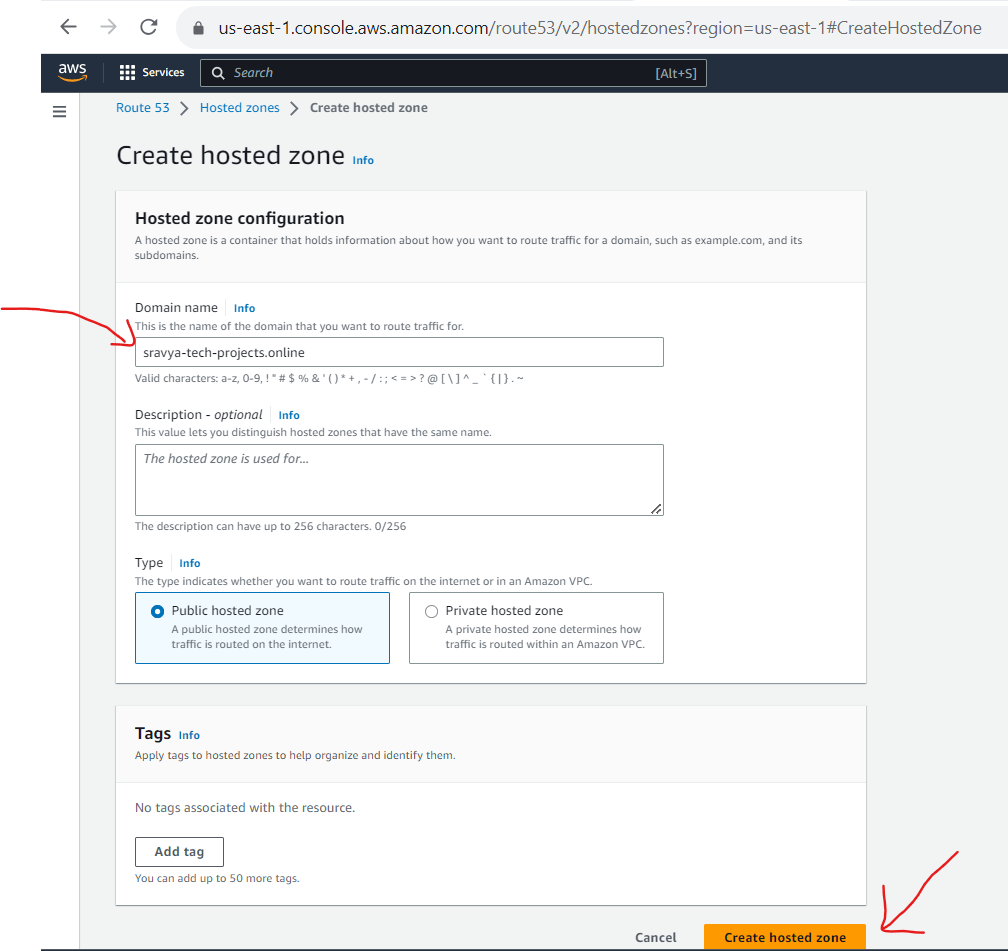
- Navigate to the AWS Route 53 console and click on Create hosted zone

- Give the domain name created in the Namecheap website and click on Create Hosted zone
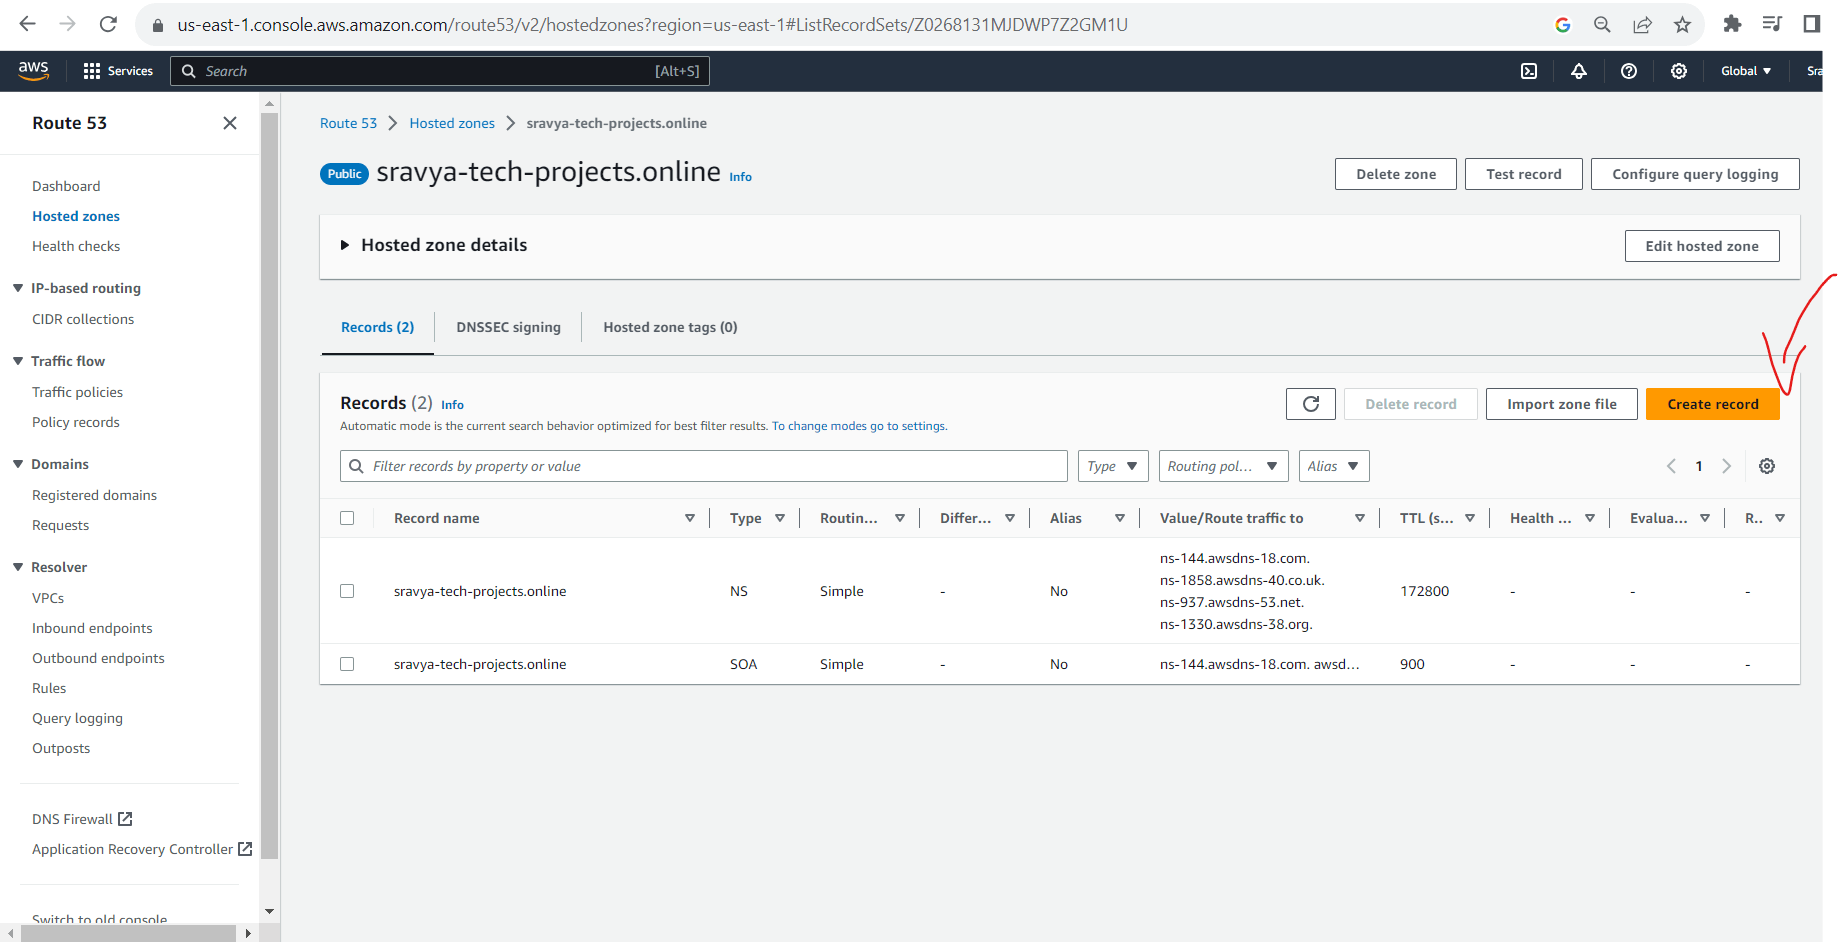
- Created a hosted zone with the Name Servers(NS) and Start of Authority(SOA) records

Update Name Servers
In the Namecheap dashboard (or your domain registrar's control panel), update the DNS name servers to match the ones provided by your AWS Route 53 hosted zone.
Note: This step links your custom domain to your AWS resources.
- Go to Name Cheap Website, Go to Domain Lists and click on Manage to update the name servers

- Go to Domain Section and Select Custom DNS under the NameServers Section

- Update the NameServers which we have under the Route53 hosted zone section

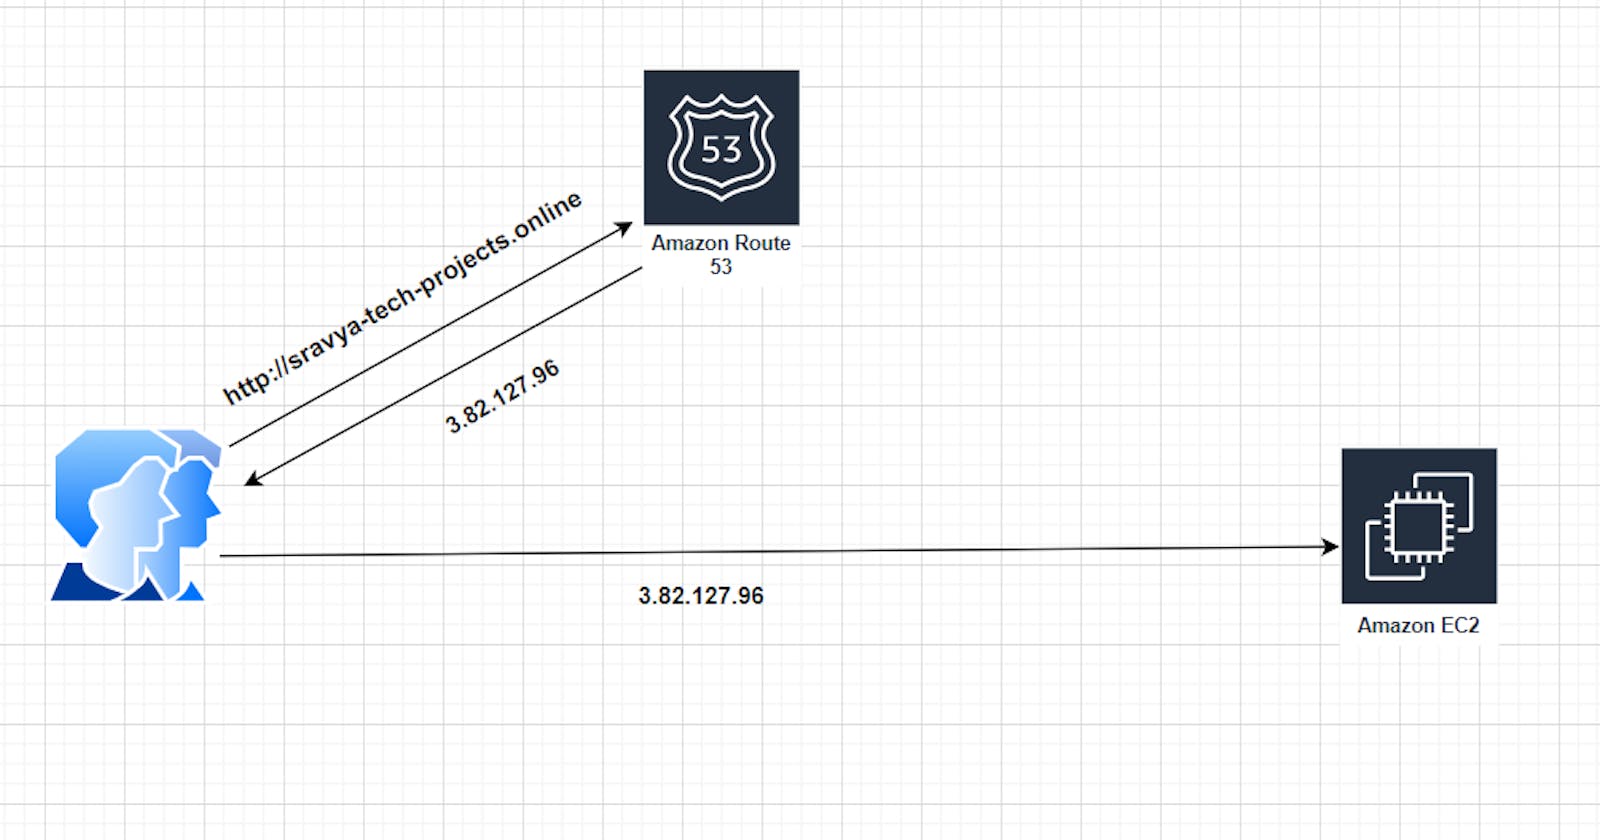
Pointing Your Domain to the EC2 Instance
Now that your domain is linked to Route 53, you need to configure Route 53 to direct traffic to your EC2 instance.
- Click on Create a new record set in your hosted zone.
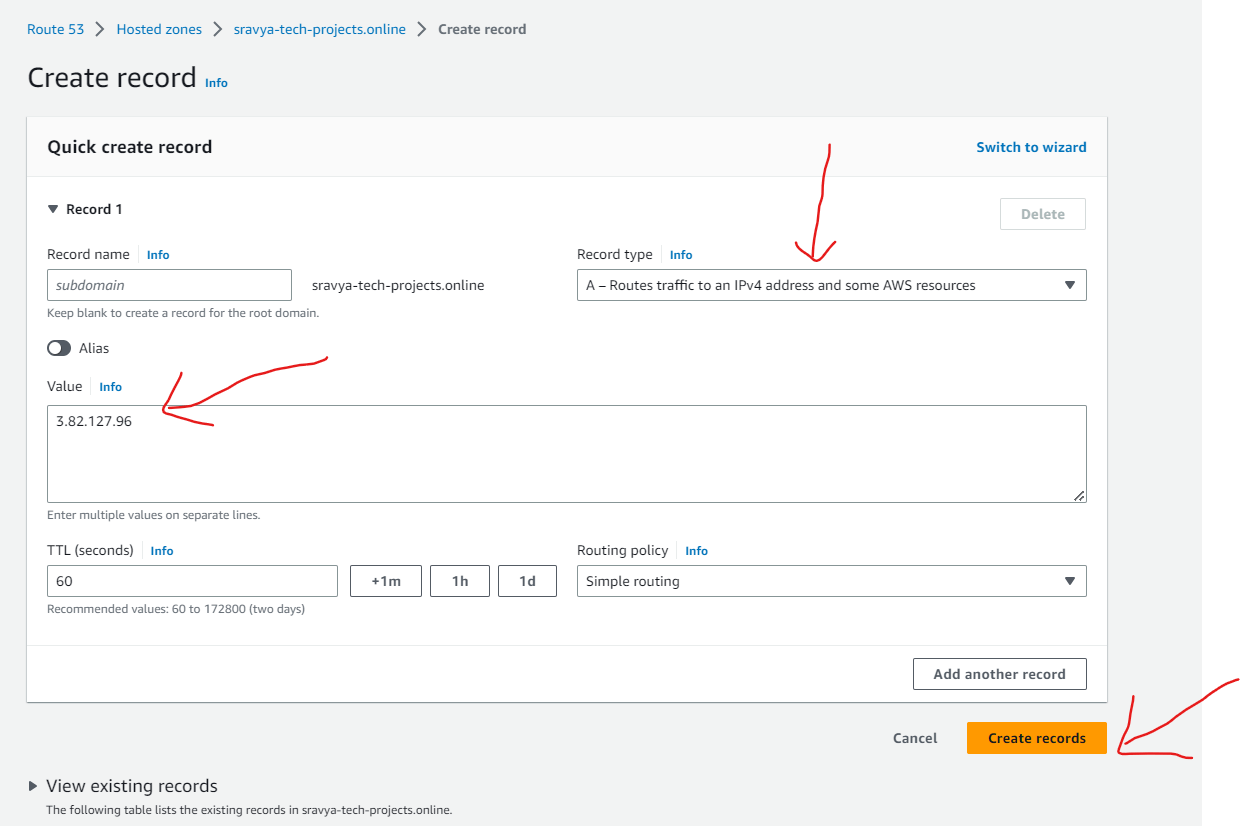
Set the "Type" to A (IPv4 address) or CNAME (for subdomains)
Add EC2 instance IP address as we are pointing to an EC2 instance and Create records
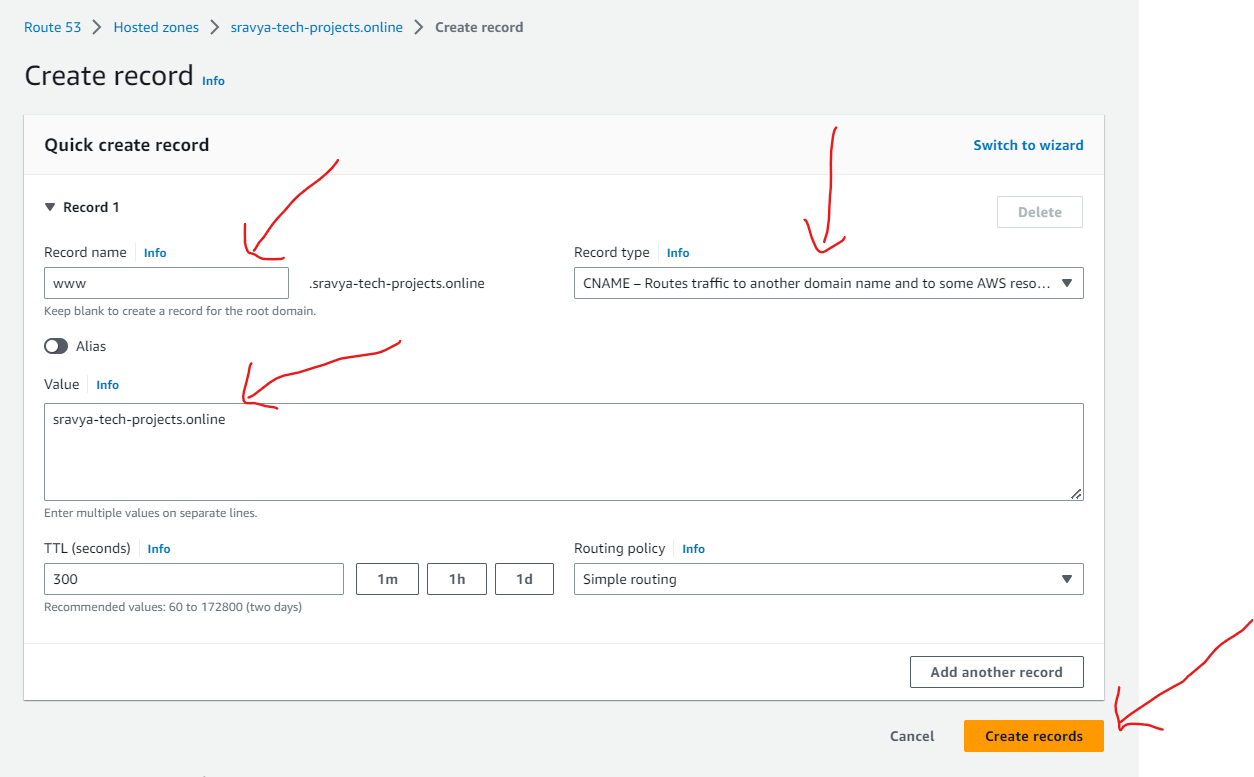
Create another record for adding a subdomain record. If we are typing sravya-tech-projects.online then also it will redirect to the sravya-tech-projects.online domain
The record type is CNAME as we are routing the already existing domain name in the hosted zone
- Records added under the hosted zone for accessing deployed application in EC2 with the Custom Domain Name

Testing Your Custom Domain
After setting up your hosted zone in Route 53 and pointing it to your EC2 instance, it's time to test your custom domain. Open a web browser and enter your custom domain (e.g., sravya-tech-projects.online or sravya-tech-projects.online). You should now be able to access your application using your custom domain.


Conclusion
Accessing your application through a custom domain not only enhances your online presence but also helps establish credibility with your users. By registering a domain with Namecheap and managing DNS through AWS Route 53, you've taken a significant step in making your application accessible to a broader audience.